User experience - near or at quota limits
When users reach the storage limit set by admins on the account, access to the services such as Drive, Gmail, and Photos will be affected in the following ways:
- Gmail: Users will still be able to send and receive email.
-
Drive: You won’t be able to sync or upload new files. You will not be able to create new files in Google Docs, Sheets, Slides, Drawings, Forms, and Jamboard. Until storage is reduced, owners won’t be able to edit or copy the files affected by the storage quota set; collaborators won’t be able to edit the affected files. Syncs stop between your computer's Google Drive folder and My Drive.
-
Photos: You won’t be able to add any more or back up existing photos or videos.
When a user’s account is 80%-100% full, in-app notifications will be visible in both Drive, Photos, and Drive for Desktop to warn users of disruption of these services.
For instance, within Google Drive the following will be displayed when storage is full for an account:

When users click on Manage Storage within Google Drive, they will see the following banners when 80% and 100% full:


For Photos, the following banner notification will be displayed when storage is 80% and 100% full for the account:
 
For Drive for Desktop, the following desktop notification will be displayed when storage
is 80% and 100% full for the account:
 
See the following sections - ‘Moving data to personal Drive/Google One’ and ‘Find large files to delete’ in this guide - for more information on how admins can discuss options users have to remove data from their accounts.
Moving data to personal Drive/Google One
This option is available for all Workspace for Education editions.
Users have two options to copy their data before their account - or the data within the account - is removed (when Takeout is enabled by admins):
-
Users can download a copy of their data in an archive format. See this Help Center Documentation for more information.
-
Users can transfer a copy of Gmail and Drive contents to another Google account, for instance students leaving a school or University. See this Help Center Documentation for more information.
To download user data from a school account:
-
Go to the Takeout page
-
Select the individual services that contain the data you would like to download or select all services. If there are important services that are not listed, for instance Blogger or YouTube, reach out to your school administrator
-
Some services have different options regarding specifics of export. For example:
-
The Calendar service has options to select all calendars or individual calendars
-
The Drive service has options to export Docs and Spreadsheets into Microsoft formats or PDFs
-
The Photo service has the option to select all Photo albums or individual albums
-
Once all services and options within those services are selected, click Next step
-
Under Choose file type, frequency & destination choose a Delivery method. Available options include:
-
Download link via email
-
Add to Drive (not recommended if the intent is to remove data from Gmail, Drive, and Photos)
-
Add to Dropbox
-
Add to OneDrive
-
Add to Box
-
Select Export once
-
Select File type & size, either .zip or .tgz archive files
-
Select archive file size, up to 50GB per file
-
Select Create export
-
If Dropbox, OneDrive, or Box were selected in step 5 above, select Link accounts and create export. This will redirect to a sign-in page for the service selected
-
An email will be sent once the export process has completed. Depending on the delivery method selected above, exports can be managed and downloads can be accessed under the Manage your exports section of Google Takeout.
To transfer Gmail and Drive data to another account from school accounts:
-
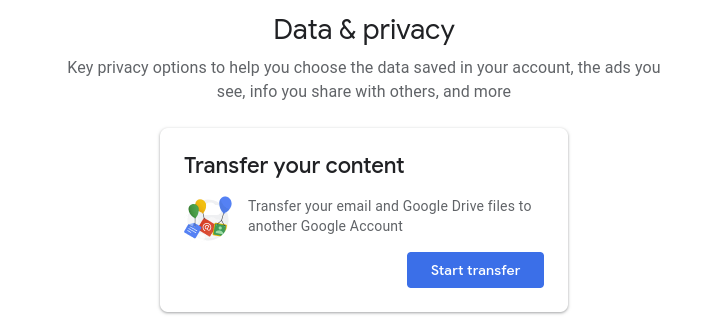
In the school account (myaccount.google.com), go to Transfer your content under Data and privacy and select Start transfer
-
Enter the destination email address of the Google Account to copy content to
-
Select SEND CODE
-
In the destination Google Account, check the Gmail inbox for a confirmation email from Google entitled ‘Verify your account’. In the email, select Get confirmation code. A new tab will open with a code. The code will be valid for 24 hours.

-
On your school account, go back to the Transfer your content page. Enter the code, then choose Verify.
-
Choose the content you'd like to copy, then click START TRANSFER.

-
Once started, both email accounts will receive an email confirming the transfer process is in progress. To view transfer progress and the history of transfers from the last 30 days, click VIEW HISTORY.

|